In this post, we are going to go over the basics of setting up your own web server on your machine and setup the DNS records to be able to access it via it’s name rather than just it’s ip
For this quick example we will use:
- Linode Cloud
- NGINX
- Cloudflare
Linode cloud
We’ll spin up a Linux instance in Linode as it is quick and easy (guide here)
Obviously you can use a home machine too if you prefer
SSH into the instance
ssh root@123.456.789.012
#password
And as usual update
sudo apt-get update
sud apt-get upgrade
NGINX
NGINX is a popular open-source web server and reverse proxy server that can be used as a load balancer, HTTP cache, and as a platform for building robust web applications.
It will allow us to redirect traffic on port 80 to our website.
Install NGINX
sudo apt install nginx
Create an NGINX configuration file
Create an NGINX configuration file called /etc/nginx/conf.d/example.com.conf (replace this and each instance of example.com with your site’s name) and add the following content:
File: /etc/nginx/conf.d/example.com.conf
server {
    listen         80;
    listen         [::]:80;
    server_name    example.com www.example.com;
    root           /var/www/example.com;
    index          index.html;

    gzip             on;
    gzip_comp_level  3;
    gzip_types       text/plain text/css application/javascript image/*;
}
Create a directory for your site’s files
The configuration above tells NGINX to look for your site’s files in /var/www/example.com. Create this directory now, substituting your domain name for example.com:
sudo mkdir -p /var/www/example.com
Give ownership of this directory to your limited user account
sudo chown username:username /var/www/example.com
Disable the default NGINX welcome page
sudo rm /etc/nginx/sites-enabled/default
Test the NGINX configuration for errors
sudo nginx -t
If there are no errors, reload the configuration:
sudo nginx -s reload
Copy the static files from your local computer to the target directory on your Linode
There are many ways to accomplish this. For example, if your site files are stored in a directory called my-website on your computer, you can use scp from your local computer:
scp -r my-website/* username@<linode-ip-address>:/var/www/example.com/
Or create a dummy static site
<!DOCTYPE html>
<html>
<head>
<title>My Website</title>
</head>
<body>
<header>
<h1>Welcome to my website!</h1>
</header>
<main>
<section>
<h2>About Me</h2>
<p>Hi, my name is Jason and I'm a web developer.</p>
</section>
</main>
<footer>
<p>© 2023 My Website</p>
</footer>
</body>
</html>
Activate the firewall using the built-in NGINX plugin for UFW
sudo ufw allow 'NGINX Full'
sudo ufw allow ssh
sudo ufw enable
Check that NGINX loaded successfully:
sudo systemctl status nginxIf NGINX loads successfully your should be able to see your site using the reverse DNS provided by Linode
Cloudflare
If you have you’re own DNS name, you can use Cloudflare to easily update DNS records to proxy your domain to your Linode.
If you don’t have one, you can try freenom for a free domain (if it’s running again), 000webhost, hostinger or google.
Or you can bridge your home router to allow Cloudflare to access it. (if you know what your doing)
Cloudflare is a popular content delivery network (CDN) and web security company that offers a range of benefits, including:
- Improved website performance and faster loading times
- Advanced security features such as DDoS protection and web application firewall
- Increased reliability and uptime with automatic failover and load balancing
- Streamlined website management with easy-to-use control panel and analytics tools
Signup for a free account
https://dash.cloudflare.com/sign-up?lang=en-US
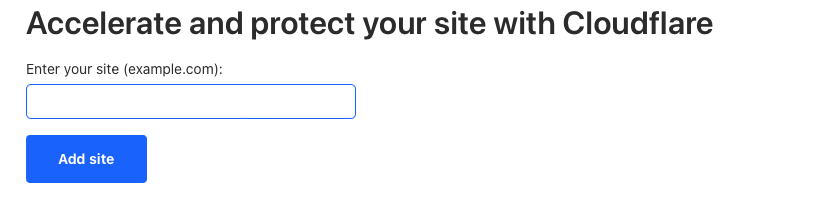
Add your domain
Search for your domain
Once found, it will prompt you to change the DNS. This will enable Cloudflare to make modifications. This will be in the domain information of your chose registry under Nameservers.
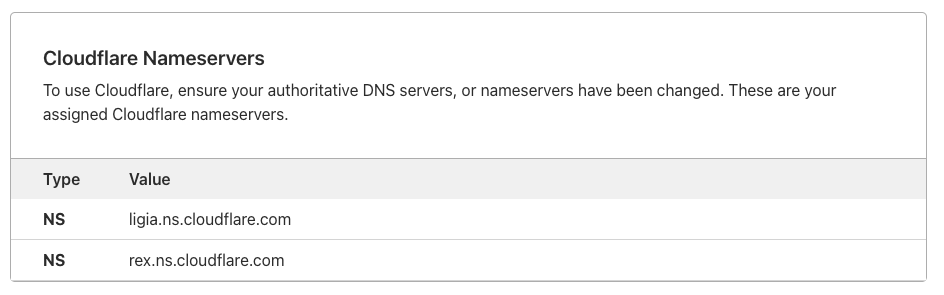
Note: this can in theory. take up to 24h but usually take 20-30min
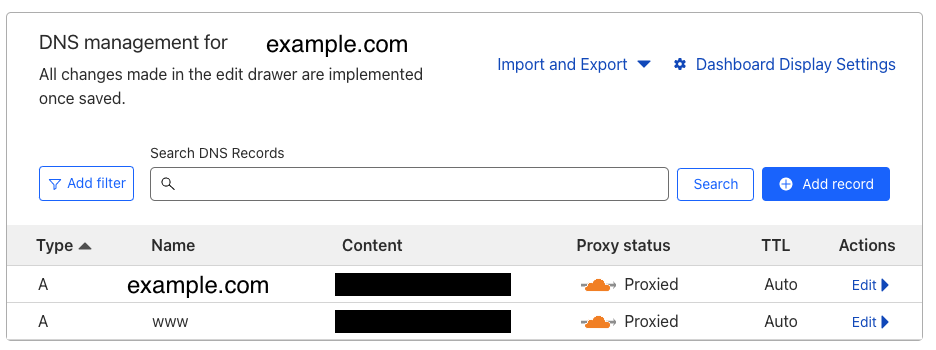
Update DNS
There might be several entries there based on how your registry is setup (keep them or ditch them depending on your needs).
Add two A type records as below. First to redirect traffic to your domain example.com (name) to your Linode server IP (content). Second to redirect www.example.com to your Linode.
And that is it, you should be able to go your browser and navigate to example.com and see your awesome site.
Note: cloudflare is fast, but not instantaneous, so you might have to wait a bit
Conclusion
With a few simple instructions, we managed to setup our own web server to display our lovely site.
And thanks to:
- Linode we can scale out server and it’s requirements
- NGINX we can loadbalance our traffic and manage our site and it’s subdomains
- Cloudflare we can manage our DNS, SSL, Certificates and many more security aspects
This gives us great basis to explore the inner workings of websites